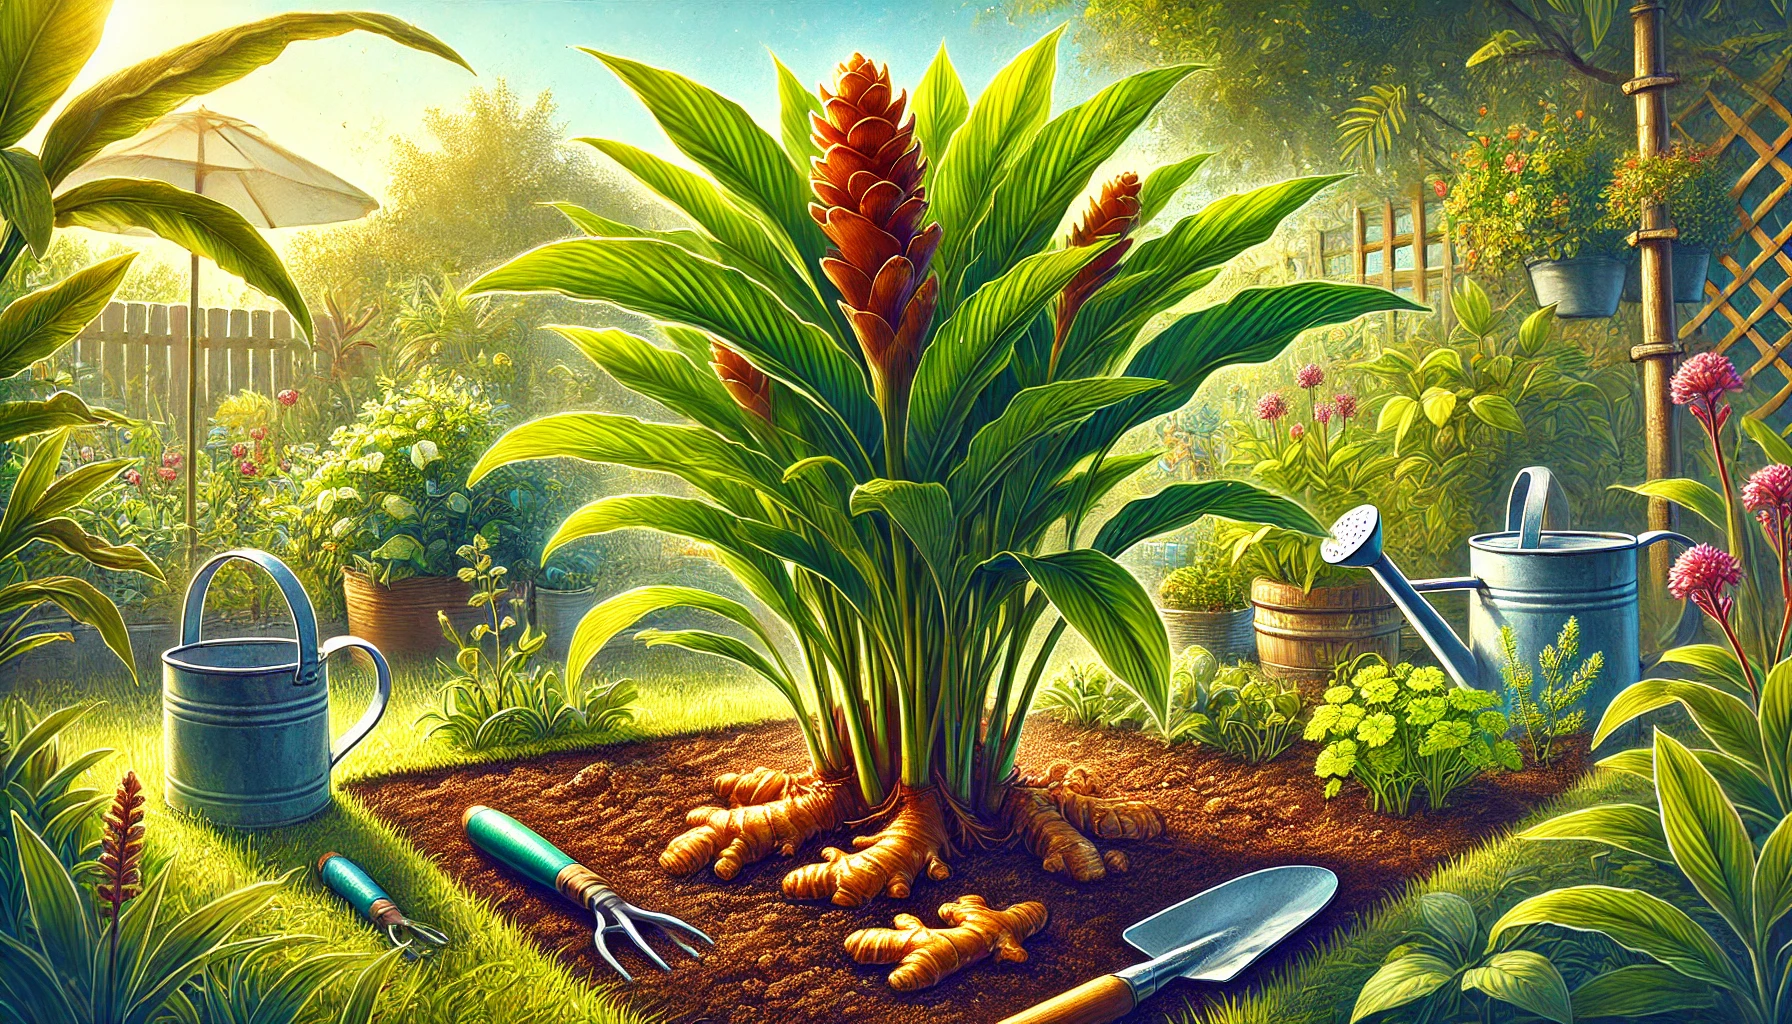
Ginger is a versatile and aromatic spice that has been used in cooking and medicine for centuries. Growing your own ginger at home can be a rewarding experience, giving you access to fresh, flavorful rhizomes whenever you need them. Here are the top 10 tips for successful ginger gardening to help you get started and achieve the best results.
1. Choose the Right Ginger Variety
There are many varieties of ginger, each with its own unique flavor and growth characteristics. The most common type for home gardening is Zingiber officinale, known for its culinary uses. When selecting ginger, look for plump, firm rhizomes with visible buds or “eyes.” These are signs of healthy, viable ginger that will sprout and grow well. Other varieties like turmeric (Curcuma longa) and galangal (Alpinia galanga) are also part of the ginger family but have different tastes and uses. Choose the variety that best suits your culinary and medicinal needs.
2. Prepare the Soil Properly
Ginger thrives in rich, well-draining soil. It prefers slightly acidic to neutral pH levels, between 5.5 and 6.5. To prepare the soil:
- Amend with organic matter: Add compost or well-rotted manure to improve soil structure and fertility. This helps provide essential nutrients and enhances the soil’s moisture-retaining capacity.
- Ensure good drainage: Ginger roots can rot if left in waterlogged soil. Use raised beds or containers with drainage holes if your garden soil is heavy clay or tends to stay wet. You can also mix sand or perlite into the soil to improve drainage.
- Avoid chemical fertilizers: Organic fertilizers provide slow-release nutrients that are better suited for ginger’s growth cycle. They also help maintain soil health and support beneficial microorganisms.
3. Select the Right Location
Ginger needs a warm, humid environment to grow. Choose a location that:
- Receives partial to full shade: Direct sunlight can scorch ginger leaves. A spot with filtered sunlight or partial shade is ideal. If you’re growing ginger indoors, place it near a window with indirect light or use grow lights.
- Is sheltered from strong winds: Ginger plants can be damaged by strong winds, so plant them in a protected area. If planting outdoors, consider using windbreaks like fences or hedges.
4. Planting Ginger
Plant ginger in the spring, after the last frost has passed. Here’s how to plant ginger:
- Cut the rhizomes into pieces: Each piece should have at least one eye. Allow the pieces to dry for a day or two to form a protective callus over the cut surface. This helps prevent rot and infection.
- Plant shallowly: Bury the rhizome pieces 2-4 inches deep in the soil, with the eyes facing up. Space them about 8 inches apart to give them room to grow. Planting too deep can hinder sprouting, while too shallow planting can expose the rhizomes.
- Water thoroughly: After planting, water the ginger well to settle the soil around the rhizomes. Keep the soil consistently moist but not waterlogged.
5. Watering and Humidity
Ginger requires consistent moisture but not waterlogged conditions. Here are some tips for watering:
- Keep the soil evenly moist: Water regularly to keep the soil damp but not soggy. Overwatering can lead to root rot. Use a watering can or drip irrigation system to provide a gentle, even supply of water.
- Increase humidity: Ginger plants thrive in high humidity. Mist the plants regularly or place a humidity tray nearby to maintain the moisture level. Grouping plants together can also help create a more humid microenvironment.
6. Fertilizing Ginger
Ginger is a heavy feeder and benefits from regular fertilization. Use organic fertilizers to provide the necessary nutrients:
- Initial fertilization: Apply a balanced organic fertilizer, such as a 10-10-10, when planting. This ensures the young plants have the nutrients they need to establish strong roots.
- Ongoing feeding: Every 4-6 weeks, side-dress the plants with compost or a well-balanced organic fertilizer. This will ensure steady growth and healthy rhizomes. Liquid seaweed or fish emulsion can also be used as a foliar feed.
7. Mulching
Mulching helps retain moisture, regulate soil temperature, and suppress weeds. Use organic mulches like straw, grass clippings, or shredded leaves:
- Apply a thick layer: Spread a 2-3 inch layer of mulch around the ginger plants, being careful not to cover the stems. Mulch helps maintain consistent soil moisture and keeps the soil cool.
- Replenish as needed: Add more mulch throughout the growing season to maintain its effectiveness. As the mulch breaks down, it also adds organic matter to the soil.
8. Pest and Disease Management
Ginger is relatively resistant to pests and diseases, but it can still be affected by some common issues:
- Aphids and spider mites: These pests can be controlled with insecticidal soap or neem oil. Regularly inspect the plants and remove any pests you find.
- Root rot: Prevent this by ensuring proper drainage and avoiding overwatering. Signs of root rot include yellowing leaves and stunted growth.
- Leaf spot: This fungal disease can be managed by removing affected leaves and applying a copper-based fungicide if necessary. Improve air circulation around the plants to reduce humidity and prevent fungal growth.
9. Harvesting Ginger
Ginger can be harvested at various stages, depending on your needs:
- Young ginger: Harvest after 4-6 months for tender, milder rhizomes. These are ideal for pickling or fresh use. The skin is thinner, and the flavor is less pungent.
- Mature ginger: Wait 8-10 months for fully mature rhizomes with a stronger flavor. The leaves will start to yellow and die back, indicating it’s time to harvest. Mature ginger has a tougher skin and more intense flavor.
- How to harvest: Carefully dig around the base of the plant to lift the rhizomes without damaging them. Use a garden fork or your hands to gently pull them up. Shake off excess soil and let the rhizomes air dry for a few hours.
10. Storing and Using Ginger
Proper storage ensures your harvested ginger stays fresh and flavorful:
- Refrigeration: Store fresh ginger in a paper towel inside a plastic bag in the refrigerator. It can last for several weeks this way. The paper towel helps absorb excess moisture.
- Freezing: Peel and slice or grate the ginger before freezing. Store in an airtight container or freezer bag for up to six months. This makes it easy to use ginger directly from the freezer.
- Drying: Slice the ginger thinly and dry it in a food dehydrator or oven at low heat. Store the dried slices in an airtight container in a cool, dark place. Dried ginger can be ground into powder for use in cooking and baking.
- Using ginger: Fresh ginger can be used in cooking, teas, and smoothies. Dried ginger is great for baking and making spice blends. Pickled ginger is a popular accompaniment to sushi and can be made by soaking thin slices in a mixture of vinegar, sugar, and salt.
By following these top 10 tips, you’ll be well on your way to growing healthy, productive ginger plants. Whether you’re a seasoned gardener or a beginner, these guidelines will help you enjoy the process and reap the rewards of homegrown ginger. Happy gardening!